
Project Installation Guide
Follow this comprehensive guide to install and run both the backend and frontend of Mega Attendance on your local system.
🛠️ Prerequisites
Node.js
Version 14 or higher required. Download from official website.
MongoDB
Version 8.0.0 recommended. Community edition is sufficient.
VS Code
Latest version recommended for best development experience.
🚀 Installation Steps
-
1
Extract the Project Files
- Locate the ZIP file of the project.
- Right-click and select "Extract All..." or use any extraction tool.
- This will create a folder with your project files.
-
2
Open the Project in VS Code
- Launch Visual Studio Code.
- Go to File → Open Folder, and select the extracted folder.
-
3
Open Terminal in VS Code
-
Use the shortcut:
Windows/Linux:Ctrl + ~
Mac:Cmd + ~ - This will open a terminal window in the bottom panel of VS Code.
-
Use the shortcut:
-
4
Set Up the Backend
- In the terminal, run the following commands:
cd backend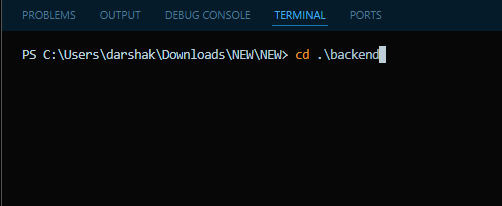
npm install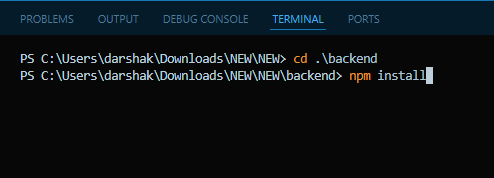
npm start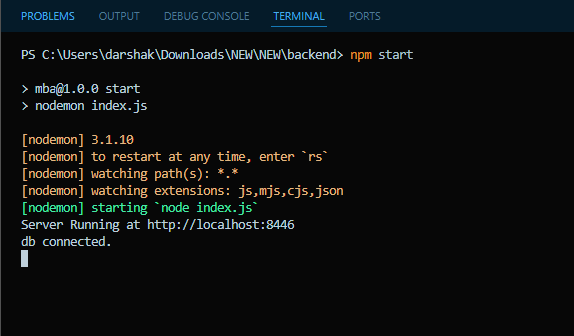
- This installs dependencies and starts the backend server.
- Your Backend is running on
http://localhost:8446
-
1
Set Up the Frontend
- Click the ➕ plus icon (right-top) in the terminal panel to open a new terminal tab.
- In the new terminal, run:
- This launches the frontend server, usually at
http://localhost:3000.
cd frontend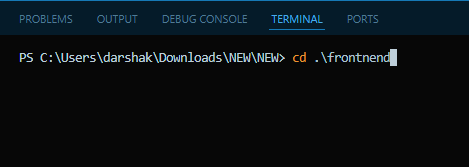
npm install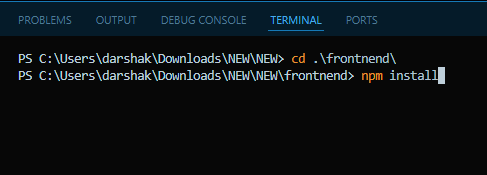
npm start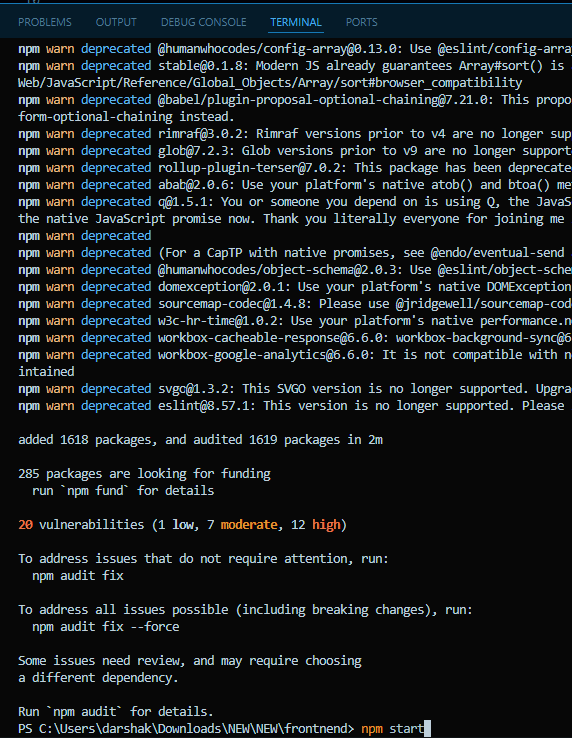
-
2
Set Up Static Data
- Open a browser and go to
http://localhost:8445/wecansetsomestaticdata. - Press Enter to load static data. Press Enter again to complete the step.
- User has to call this API two times in the browser.
- Open a browser and go to
Backend:
http://localhost:8445 (or configured port)Frontend:
http://localhost:3000
If you want to deploy this project live, update the .env files in
both /frontend/.env and /backend/.env.
-
1
Unzip the Folder
- Extract the zip folder containing both the Faculty and Student Flutter apps (e.g.,
Ams_Application).
- Extract the zip folder containing both the Faculty and Student Flutter apps (e.g.,
-
2
Set Up Development Environment
- Ensure Flutter SDK (version 3.22 or higher) is installed.
- Download and install Android Studio (Koala | 2024.1.1 or later).
- Install Flutter and Dart extensions in Android Studio.
- Open each app project (Faculty and Student) in Android Studio.
-
3
Customize Faculty App
- Open
lib/config/app_config.dartin the Faculty app project. - Update the baseUrl with your domain name (e.g.,
https://yourdomain). - Replace the google-services.json file:
-
- Create a Firebase account and project.
- Download google-services.json from Firebase.
- Place it in
android/app/directory of the Faculty app.
- Open
-
4
Customize Student App
- Repeat the same changes for the Student app:
- Open
lib/config/app_config.dartand update the baseUrl. - Replace
android/app/google-services.jsonwith the Firebase file.
-
5
Customize Web Code for Firebase Integration
- Locate the serviceAccountKey file in
C:\xampp\htdocs\installer\fullstack_installer\NEW\backend\utils\. - Generate a service account file from Firebase:
-
- In Firebase, go to Project Settings > Service Accounts.
- Generate a new private key and download the JSON file.
- Replace the existing serviceAccountKey file with this new file.
- Locate the serviceAccountKey file in
-
6
Build the Apps
- After making changes, build both apps using Android Studio.
- Run the apps on an emulator or physical device to test.
🔧 Troubleshooting
API Issues
- Ensure
HTTP_AUTHORIZATIONis enabled on your server. - Verify backend URL in the app and web panel.
- Contact hosting provider or open a Support Ticket.
App Registration
- Confirm the Megascale Purchase file is valid and not used elsewhere.
- Check your internet connection during registration.
- Verify your license key is correctly entered.
Push Notifications
- Check Firebase configuration and
firebase_notification_key.json. - Ensure proper permissions are set in AndroidManifest.xml.
- Verify device token is being correctly registered.
Flutter Build
- Run
flutter pub getin the project directory. - Verify Flutter SDK path in Android Studio.
- Check for errors in
google-services.jsonor Firebase setup.
Need Help?
Our support team is ready to assist you with any issues you might encounter during installation or setup.
Support Ticket
For installation or configuration help, open a Support Ticket at:
https://www.megascale.in/supportInclude your Megascale Purchase Code and site URL for faster resolution.
Contact Information
Email:
info@megascale.inWebsite:
www.megascale.inSupport Hours:
Monday - Friday: 9:00 AM - 6:00 PM (IST)
Support Coverage
Our support covers code features, bugs, and application issues but excludes customizations or third-party plugins.
Included in Support:
- Installation assistance
- Configuration guidance
- Bug fixes and troubleshooting
- Feature clarification
- Update assistance
Not Included:
- Custom feature development
- Third-party plugin issues
- Server configuration
- Custom design changes
- Data migration from other systems
Frequently Asked Questions
What are the system requirements?
For optimal performance, we recommend a server with at least 2GB RAM, 1 CPU core, and 20GB storage. The application supports all major browsers including Chrome, Firefox, Safari, and Edge.
Can I customize the application?
Yes, Mega Attendance is designed to be customizable. You can modify the branding, colors, and certain features to match your institution's requirements. Advanced customizations may require development knowledge.
Is there a limit to the number of users?
The standard license supports up to 1,000 active users. For larger institutions, we offer extended licenses that can accommodate unlimited users. Contact our sales team for more information.
How often are updates released?
We typically release major updates quarterly and minor updates/bug fixes monthly. All licensed users receive free updates for the duration of their support period (typically 6 months from purchase).